
Using Content Rules
This tutorial discusses what content rules are and how to configure and use them.
Helicopter view
Content Rules are a powerful mechanism to automate dealing with content.
There are several steps, that follow one another:
Define the rule
create and name a new rule, specifying what triggers it to be executed
then narrow it down, by using conditions, to execute only on the content items you want
and select the action or actions that should be taken
Afterwards, you end up with a ready-to-go, named Content Rule. But by default it will not execute yet; there is one more step to take:
Apply it to a portion of your site. Or to the whole site, if you so choose to.
Why is the setting up of a Content Rule separated from the application? Because you may want to have different content rules applied to different parts of your site.
Triggers, conditions, actions
A general overview what makes up a content rule, some sample use cases, and who can set up and use content rules.
What is a content rule?
A content rule will automatically perform an action when certain events (known as “triggers”) take place.
You can set up a content rule to send an email (the action) whenever certain (or any) content is added to a specific folder (the trigger).
Other use cases for content rules
Move content from one folder to another when that content item is published
Send email when a content item is deleted
Delete content after a certain date
Who can set up and use content rules?
Site Manager permissions are required to in order to set up and apply content rules.
What are the triggers, conditions and actions that come with Plone 5.0?
The following general triggers are available by default:
Comment added
Comment removed
Comment reply added
Comment reply removed
Object added to this container
Object copied
Object modified
Object removed from this container
User created
User logged in
User logged out
User removed
Workflow state changed
These triggers can be made more specific by using conditions
The following general conditions are available by default:
Content type: the type has to be one or more specific ones, like a Page or News Item
File extension: do only for type .PDF, for instance
Workflow state: only act on unpublished items, for instance
Workflow transition: only act when an item is being published
User’s Group: only act when one of the “Sports Team” members logs in
User’s Role: only act when a Site Administrator logs in
TALES expression: an advanced, programmable condition.
The following actions are available by default:
Logger - make an entry in the event log
Notify user with an information, warning, or error message
Copy to folder
Move to folder
Delete object
Transition workflow state
Send email
Note
Content Rules are extendable.
There are add-ons available that will create new actions, conditions or triggers, and you can also write your own.
Creating and Defining Content Rules
How to define content rules using the triggers and actions included in Plone
Creating a Rule
Content rules are created globally through the Plone Control Panel (“Site Setup” link) and then selected from the Rules tab for the desired folder (or at the Plone site root if you want the rule applied site-wide).
In this example, you’re going to create a content rule that will send an email any time a Page type is modified.
Click on “Content Rules” from the Site Setup page
The first option, “Disable Globally”, allows you to disable ALL content rules. This is the emergency brake, for when you have created rules that are not doing what you want.
In the second section of the main page for Content Rules is where any existing content rules will be listed. There are also some checkboxes to filter them, which can be useful if there are many rules defined.
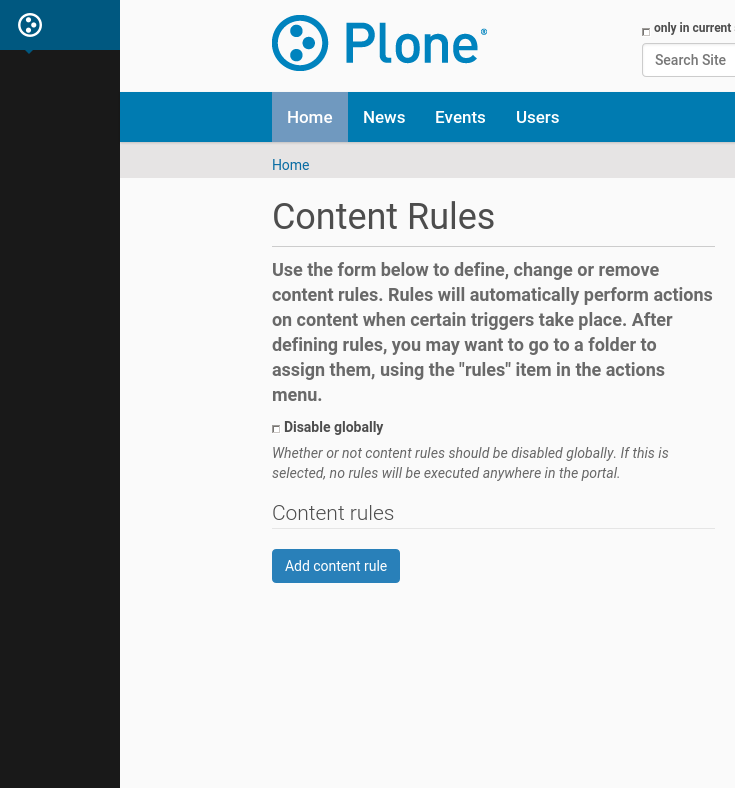
If no content rules exist, the only option is an “Add content rule” button. Click that.
An “Add Rule” form comes up. Enter a descriptive title – for this example, use: “Send Email when any Page is Modified”. Enter a description if desired.
For the “Triggering event” select “Object modified”. Leave “Enabled” checked, and “Stop executing rules” and “Cascading rule” unchecked.

Click the “Save” button. At this point, you have essentially created a “container” for the content rule.
Next you’ll further define the trigger and actions for this rule.
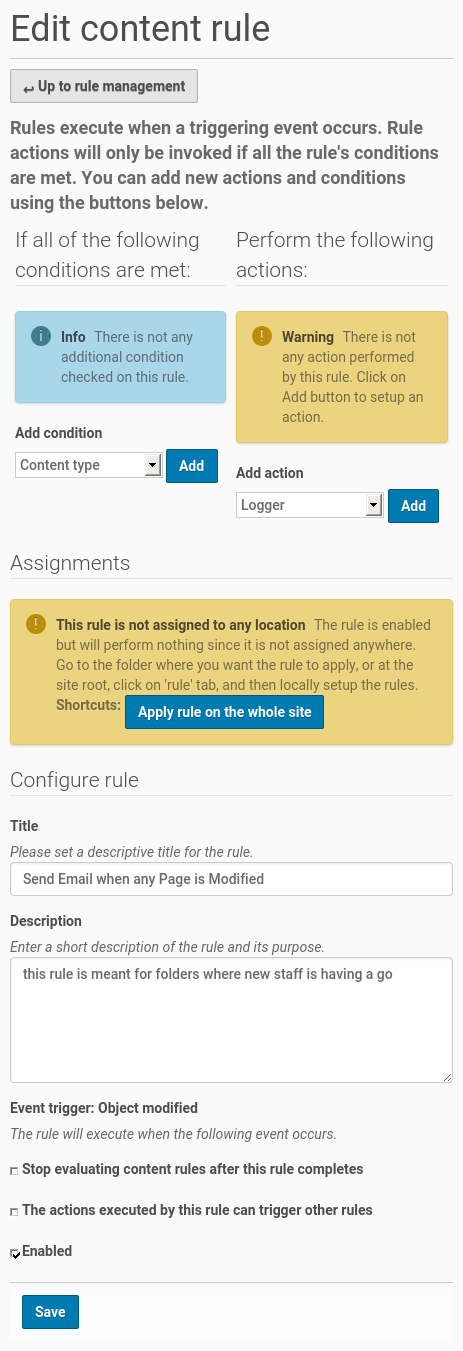
Defining conditions and actions
After creating a content rule, you need to actually define the specific conditions of the trigger and actions that will occur based on those conditions.
For the condition:
By default, “Content type” is selected and since you want a trigger only for Pages, click on the “Add” button.
From the “Add Content Type Condition” page, select “Page” and click on “Save”
For the action:
Select “Send email” from the drop down menu and click on the “Add” button.
From the “Add Mail Action” page, fill out the form:
For the “Subject” enter: “Automated Notification: Page Modified”
“Email source” is the From: address and is optional
“Email recipients” is the To: address; enter a valid email address
For the “Message” enter what you want for the body of the email
Click the “Save” button
Congratulations, you have created a working content rule!
In the next section, you’ll learn how easy it is to apply this content rule to any part (or all) of your Plone site.
Assigning a Content Rule
Now that you’ve set up a content rule, how does it actually get used?
At this point, you have successfully created a content rule. However, this content rule isn’t actually in use until it has been assigned and enabled on one or more folders.
Navigate to the folder where you want the content rule to be in effect. This can be any folder on the Plone site or it can be for the entire Plone site (“Home”). In this example we’re going to the “News” folder.
Click on the “Rules” tab. From there you will see a drop down menu of possible content rules:
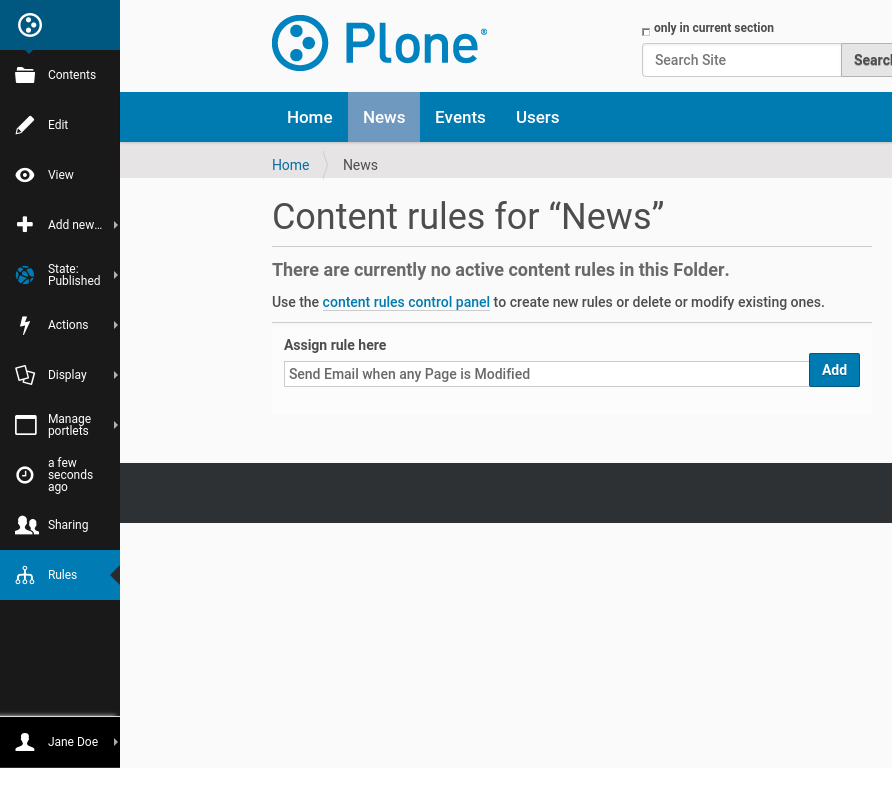
Select the desired content rule (“Send Email…” in this example) and click on the “Add” button.
By default, the rule has now been applied to the current folder only as indicated by the symbol in the “Enabled here” column indicates.
There will be several buttons near the bottom.
Tick the check box for the rule you want (“Send Email…”) and then click on either “Apply to subfolders” button.
Now this content rule will also apply to any subfolder that exist now or are created in the future.
If you wish to have this rule apply to all the subfolders but not to the current folder, then tick the check box next to the rule and click on the “Disable” button.
Note
The “Enabled here” column is empty for this rule now.
You will need to explicitly use the “Enable” button to re-active this rule for the current folder; using the “Apply to current folder only” button will NOT re-enable the content rule.
The Apply to subfolders and Apply to current folder only can be thought of as toggles.
You can test this rule now by creating a new Page or modifying an existing Page.
Once you click on Save for that Page, an email will be sent.
Managing Multiple Rules
For each rule, you can define if additional rules should be applied after it, or if it is the end of the pipeline.
Furthermore, you can specify if you want rules to be cascading or not.
An example: the first ContentRule is triggered for a content item, which is then moved to a folder. But, in this folder, another ContentRule is active, which will operate on any new content item that gets moved into that folder. Cascade means that yes, the second rule should be applied.
Note
It is entirely possible to create never-ending loops this way: Rule1 moves newly published files in Folder1 to Folder2.
But Rule2, which is active in Folder2, unpublishes any newly moved files, and then copies them into Folder1. And so it goes round and round…
Be careful when using cascading rulesets!